Monday 30 May 2011
EXPERIMENTA INVITES YOU TO THE BOOK LAUNCH OF SYNTHETICS
EXPERIMENTA INVITES YOU TO THE BOOK LAUNCH OF SYNTHETICS
| Time | 09 June · 16:30 - 19:30 |
|---|---|
| Location | Brunswick Street Bookstore, 305 Brunswick Street, Fitzroy |
| Created by: | |
| More info | Experimenta the Australia Council for the Arts invites you to the Melbourne launch of an important new book on the evolution of Australian art and technology “Synthetics: Aspects of Art and Technology in Australia, 1956-1975”. Written by video artist and electronic engineer, Stephen Jones, the book charts how Australian artists have used new technologies in their art, from the early days of digital computing in the 1950s to a key exhibition in 1975. RSVP by 7 June to: kat@experimenta.org More info, visit http://mitpress.mit.edu/ca |
Wall
Friday 27 May 2011
Wednesday 25 May 2011
ASSESSMENT
Our first assessment day went well. Found that my technical skills are good (even though i had to miss so many Premier and AEffects classes last term). My creativity concepts need work, I know this but it is difficult because my 'art tastes' are very different to Davids. I like to be able to see the image clearly but am learning to just go with it, and layer images even if i don't like the final look, i'm still learning the process which will be useful in the future.
David can we do some of our 'own' projects in the final term, based on what we've learnt this year???
David can we do some of our 'own' projects in the final term, based on what we've learnt this year???
PHOTO-TUTS PLUS...excellent photography resource
Got slightly carried away with links to the website below....but found myself saying wow!
to so many of its pages, that i thought it will be such a good resource for everyone.
http://photo.tutsplus.com
to so many of its pages, that i thought it will be such a good resource for everyone.
http://photo.tutsplus.com
Paper Tower Project


I'm doing lots of research into nature shapes and geometric shapes and origami to find out what will be the strongest for the tower. I can see many a late night folding origami towers!
Tuesday 24 May 2011
Monday 23 May 2011
Friday 20 May 2011
Online Photography Course
Does anyone know of a good on-line photography course, not typed, video demonstations only please?
Thursday 19 May 2011
Diwali Incense notes
Pitty the video is so jerky and pixelated.
I've like to know how to fix the jerkyness, I know the pixels are from low resolution.
David, do you know how to make the video play smoothly?
I've like to know how to fix the jerkyness, I know the pixels are from low resolution.
David, do you know how to make the video play smoothly?
request to David
Most of the class are mainly interested in photography as their chosen art and so can we please learn lots more 'photography techniques' ie, how to: portraits, sunsets, night photography or more after photo effects like HDR.
Thanks David.
Thanks David.
HDR photos
I spent most of Thursday afternoon photographing the Brahma Kumaris Centre for Spiritual Learning (the meditation centre where i volunteer), using HDR technique.
I look forward to learning this and hope to produce some lovely photos for the Centre to use in their advertising.
I'll post some examples when done.


I look forward to learning this and hope to produce some lovely photos for the Centre to use in their advertising.
I'll post some examples when done.


Wednesday 18 May 2011
Gallery visits
I'm really enjoying the extra visits to local art galleries. We have some lovely ones here on the Mornington Peninsula. I highly recommend the Manyung Gallery in Mt Eliza. It is in a beautiful setting, has great art and sculptures and a very nice cafe.


Sunday 15 May 2011
Saturday 14 May 2011
a 'must see' website link.....INTERACTIVE WEBSITE
http://www.experimenta.org/exhibitions-projects/online-art-work-commission-2010/in-my-dreams.html
You Were In My Dream
Artists: Van Sowerwine and Isobel Knowles
2nd term
2nd term has started off well. Seems like we have more time to do assignments and less 'extra curricular projects' (installations) to try to get our heads around.
I'm now attending every After Effects and Premier Pro class, even though this means missing story boarding. AE and Premier were my main stressors last term as i was trying to do the assignments without being able to attend the in class lessons. Something had to give, and storyboards is it.
I'm enjoying regular outing to local art galleries, the Peninsula was quite a good arts community and therefore several great galleries.
Next trip will be Manyung gallery in Mt Eliza, they always have wonderful art and sculptures as well as a lovey cafe.
Mc Clelland gallery visit
I visited the gallery and sculpture park last week. Loved most of the sculptures but the artworks David Wadelton: icons of suburbia were not my cup of tea.


Experimenta Utopia link on Youtube
http://www.youtube.com/watch?v=K1Pi4Ip_V7w
I visited the exhibition on Friday, this is a collection of the photos/videos that i took of it.
I visited the exhibition on Friday, this is a collection of the photos/videos that i took of it.
Tuesday 10 May 2011
HDR PHOTOGRAPHY blurb
Unfortunately i was unable to attend the 1st leason of term 2 on HDR, as i needed to attend the afternoon session of drawing, and when i arrived early in week 2 for the HDR class David was away unwell. Hopefully by week 3, I can get some in-class instruction.
I went up to Mt Dandenong and took what i thought would be some lovely HDR images, however when i got home and tried to merge the 3 exposures I realised that you REALLY DO NEED to use a tripod. I thought that the HDR software would line up the images, but unless you use a tripod the images are too difficult for it to line them up nicely.
Anyway, we live and learn. So once the weather stops raining i'll go out and take more images, and keep practicing, it seems like an excellent photographic skill to have up ones sleeve.
Monday 9 May 2011
Sunday 8 May 2011
Friday 6 May 2011
Working the Lines in your Photography

When considering the composition of an image one of the elements that I suggest digital camera owners look for are ‘Lines’.
The lines that can be found in images are very powerful elements that with a little practice can add dynamic impact to a photograph in terms of mood as well as how they lead an image’s viewer into a photo.
Over the next few posts I’ll consider three types of lines, ‘horizontal’, ‘vertical’ and ‘diagonal’. Each one has a different impact upon a photograph and should be looked for as you frame your shots.
Learning how to use lines in photography doesn’t just happen. It takes time and practice to become good at it.
A good way to practice is to go back through older images that you’ve taken and look for lines that worked well and those that didn’t.
Then next time you go out with your camera, before you frame your shot consciously ask yourself what lines are in front of you and how you might use them to add something to your next shot by working with them rather than against them.
Also ask yourself whether the lines form any interesting patterns that you might be able to accentuate to add a further layer of interest to the shot.
Read the rest of this series so far at:
Read more: http://www.digital-photography-school.com/working-the-lines-in-your-photography#ixzz1LdpkCJeo
How to Shoot in Direct Sunlight
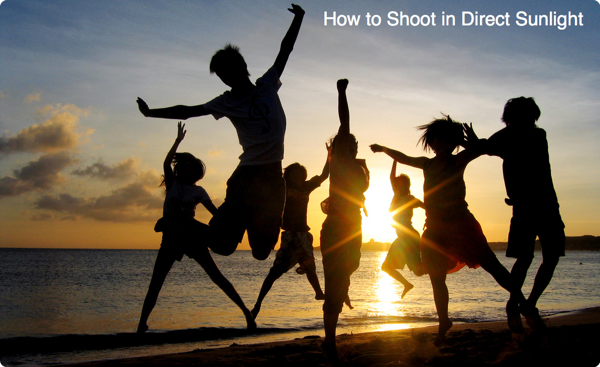
image by 油姬
Shooting in direct sunlight can lead to images that have high contrast, blown out highlights, lens flare and colors that might even look overly saturated. If you’re shooting portraits they can also lead to the ’squint factor’. So what’s a photographer to do?
Here are eleven quick and simple tips at combating the problems that bright sunlight might bring when shooting outdoors:
1. Move into the shade
With some subjects you’ll be able to move them (and yourself) into the shade. This is particularly relevant with portraits where your subject is highly portable. Sometimes the simplest solutions are best.
2. Make your own shade
If your subject is not movable (for example if you’re shooting macro work with a flower) create your own shade. Use your own shadow, the shadow of someone else or bring an object with you (like an umbrella, a reflector or large sheet of card) to block out the sun.3. Use Fill in Flash
Most of us were trained to put the sun behind you when taking a photograph so that your subject will be well lit. Shooting into the sun may lead to lens flare or a dark subject – but at times it can improve it drastically – particularly if you use a flash to fill in the shadows that are created by doing so (learn more about using fill flash).4. Use a Reflector
Another way to fill in the shadows caused by direct sunlight is to use a reflector. These bounce light up into the face of your subject and are great because they allow you to shoot into the sun – as with when you’re using fill in flash.5. Change Your Perspective
Sometimes moving your subject isn’t possible – but moving around it can give a different impact. This might be moving to the other side of the object, shooting from directly above or even getting down low and shooting up. Doing so will change the angle of the sun hitting both your subject and the camera and give your image a completely different feel.
6. Use a Lens Hood
Suffering from lens flare? If your lens came with a lens hood – get it out and use it. If you don’t have one – it’s not difficult to construct one out of card – or to even use your hand to shield your lens from the sun. Just make sure that your shot is free of your hand or the DIY hood that you’re using (learn more about eliminating lens flare).7. Filters
Sometimes a filter can be handy when shooting in bright sunlight. I try to take a Polarizing filter or Neutral Density (ND) filter with at all times. The polarizing filter will help cut down on reflections and both will cut down the light getting into your camera to let you use slower shutter speeds and smaller apertures if you’re looking for more control over these elements of exposure. Polarizing filters have the added bonus of giving you some control over some colors – particularly when you’ve got a blue sky in your shot (learn more about using filters).8. Play with White Balance Settings
Many digital cameras come with the ability to choose different white balance settings. While you can make adjustments later on post processing (particularly when shooting in RAW) choosing the right setting at the time of shooting can be worth experimenting with. I personally shoot in RAW and do this later on my computer – but have friends who prefer to do it in camera.9. Metering
Direct sunlight makes correct metering tricky. In these conditions I generally choose spot metering mode on my DSLR and choose the main subject of the scene that I’m photographing (the focal point) to meter off. Alternatively pick a mid-tone area to meter off if you want everything to be exposed relatively well. Check your shots immediately to see if you need to adjust your technique (your histogram can be handy here) and if you have the luxury of time – take multiple shots metering off different parts of the scene so that you can choose the best one later.10. Pick The Time of Day to Shoot
For many of us we won’t have the luxury of sitting all day long waiting for the perfect light – but if you do, the time of day can dramatically impact your shot. Dawn and Dusk are particularly good times to shoot as the direction and color of the light is often more useable than the direct overhead light of noon.
11. Shoot Silhouettes
‘If you can’t beat em join em’ is a saying that could come into play here. If the bright light of the Sun is causing you a headache – why not use it to your advantage and make your subject into a Silhouette against a bright background (learn more about Photographing Silhouettes).Read more: http://www.digital-photography-school.com/how-to-shoot-in-direct-sunlight#ixzz1La9BRJKT
Zoo Photography
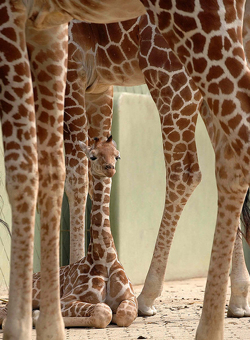
I recently took a trip to my cities zoo to do a test on a camera that I was reviewing and thought I’d share a few tips that I put into practice along the way.
Zoos are great locations to practice photography as they present us both with a great variety of subjects (both animals and the people watching them) but also with some real challenges. Some of the things you’ll need to overcome in getting great shots at a zoo include:
- Distance – the space between photographer and animal
- Moving Subjects – animals rarely stay in the one place for long
- Tricky Lighting – foliage and indoor/outdoor shooting can prove to be challenging
- Cages and Glass – while many zoos are improving in how they contain their animals and are giving them more natural surroundings the challenge of photographing them without the distractions of reflections off glass or grim looking bars both in the foreground and background add to the ‘fun’ of zoo photography
Zoo Photography Gear
What camera and gear will you need to get good photos at a zoo?The answer to this question will vary a little from photographer to photographer depending upon their style, the type of shots that they want to take and the type of zoo that they’re visiting – however, a long zoom lens will almost always be handy to have attached to your camera.
Camera/Lenses – This means you’ll either need a DSLR with an attachable longer focal length prime lens or telephoto lens (something with an upper length of 200-300mm would probably be handy) or a point and shoot camera with a super zoom lens (probably a 10-12x Optical Zoom).
Also consider taking a macro lens if you’re lucky enough to have one. At our zoo we have a number of enclosures where they are handy (a butterfly enclosure for example).
Tripod – Also consider a tripod or monopod (depending upon the weather and how light it is, you’ll probably find that in some animal enclosures you’ll need to use slower shutter speeds which mean you’ll need the extra stability).
Lens Hood – the combination of shooting outdoors, having limited angles to shoot from (which means sometimes you’ll need to shoot into the sun) and that at times you’ll be shooting through glass means that a lens hood might be handy to have. I actually left mine in the car and as it was a bright day my images suffered considerably as a result.
Zoo Photography Tips
1. Points of Interest – Before you start photographing an animal ask yourself ‘what is it about this animal that interests me?’ What has drawn you to photograph it above other animals around you? Does it have great colour, is it in a humorous pose, is it about it’s expression, is it something about it’s surroundings? The reason to ask these questions is that they help you to identify potential points of interest for your image (something that will take your shot to the next level) and will help you to determine how to approach the shot.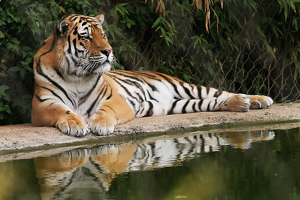
2. Get in Close – as with many styles of photography, if you’re able to get close to your subject you create a feeling of intimacy with it and are able to capture details that you’d not otherwise have been able to see. Of course with animals in cages this is a challenge and getting close will almost always need to be done using a longer focal length (you can of course help a little by shooting for as close as you can get – without breaking any zoo rules). Tightly cropping the animal’s face or body helps you get shot with a real impact but also helps eliminate any distracting elements in the photo.
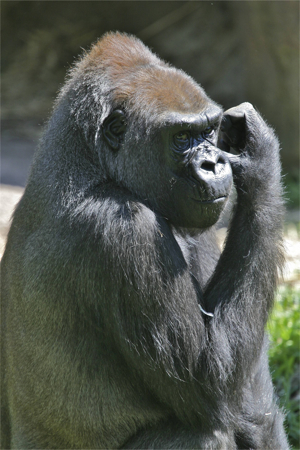
3. Focus on the Eyes – the eyes are the ‘window to the soul’ in portrait photography and a similar thing is true when shooting animals. Get the eyes in focus and in a prominent position in your shot and you’ll help create a more personal connection between your subject and the viewer of your image. 4. Get down Low - photographing an animal down at their level is another way of creating a sense of closeness and intimacy with your subject. This might mean you need to get down on your knees (and get a little dirty or look a little silly) but it will give your shots punch.
5. Eliminating Reflections – shooting through glass is a real challenge and something to avoid if you can. If you can’t get around it get in close to the glass, give it a wipe with a cloth (or your sleeve) to get rid of finger prints, find a spot that is less scratched than other parts, use a lens hood and/or your hand to try to eliminate any reflections and attempt to shoot at right angles to the glass. If you can’t eliminate reflections you might also like to try to work with them. Take a few steps back and incorporate the reflections of those watching the animals into the shot (hard – but if you get it right it could make for a great shot).
6. Shooting through Cages – there’s nothing worse than trying to shoot through the wire or bars of a cage. On occasions you’ll be able to find a wider opening (look for the bigger gaps around gates) but when you have to shoot through cages get up as close as you can to them, use a longer focal length, choose a wider aperture and wait for the animal to move back from the cage. In many instances when you do this you’ll not even notice the distraction of the cage at all. But what if you are using a point and shoot with no control over aperture? Try switching to portrait mode which is a mode that uses a wide aperture and should narrow your depth of field.
7. Shoot People – speaking of people – they also make a great subject when at the zoo. Don’t just focus on the animals but look for the wonderful reactions of those around you as they react to the animals (they can sometimes be more animated than the animals as they mimic them).
8. Look for Humorous Situations - animals do the funniest things. Keep your camera up to your eye for that moment when the monkey points at you, the giraffe picks it’s nose with it’s tongue (sorry – they do do it) or when the Emu pokes its head through the cage to steal something out of someone’s bag.
 9. Treat Animals as Moving Subjects – to
overcome the problem of your subjects always being on the move consider shooting with a fast shutter speed. You might like to switch to shutter priority mode at a fast shutter speed or let your camera do the work by shooting in ‘Sports’ mode. You can also help with this by shooting in continuous shooting mode so that when your subject is on the move you capture a burst of shots quickly one after the other.
10. Plan your day - I’m a fairly spontaneous kind of person but when it comes to photography have learned that it’s worth thinking ahead. When you get to the zoo get yourself a map and work out which animals will be on your hit list. Also note any feeding times that are publicised (these can make for some action shots). You might also like to find a zoo keeper to ask them what times certain animals are more active. Another good strategy is to head to the gift shop of the zoo and take a quick look at their postcards and picture books that might give you a little inspiration and a few ideas on good shooting angles for different animals.
11. Patience – occasionally you’ll stumble upon an animal in the perfect pose for a shot when you first see it – but in many cases you’ll need to wait for it. Once you’ve picked the animals you want to capture give yourself extended periods of time to camp out at their enclosures. This way you’ll hopefully see them in a variety of positions and with different expressions. This is what often takes your zoo shots to the next level.
12. Think About Context – the beauty of zoo photography is that you get relatively close to animals (something that is obviously difficult in the wild). The challenge is that the environment is not a natural one and that on many occasions there will be distracting elements in the background or foreground. Where possible try to shoot from angles where ‘natural’ looking elements are included (vegetation etc) – but where there are distractions you might like to try using wide apertures (small numbers) which narrow depth of field and throw foreground and backgrounds out of focus. Also try cropping with focal length (or later at home with photoshop).
5. Eliminating Reflections – shooting through glass is a real challenge and something to avoid if you can. If you can’t get around it get in close to the glass, give it a wipe with a cloth (or your sleeve) to get rid of finger prints, find a spot that is less scratched than other parts, use a lens hood and/or your hand to try to eliminate any reflections and attempt to shoot at right angles to the glass. If you can’t eliminate reflections you might also like to try to work with them. Take a few steps back and incorporate the reflections of those watching the animals into the shot (hard – but if you get it right it could make for a great shot).
6. Shooting through Cages – there’s nothing worse than trying to shoot through the wire or bars of a cage. On occasions you’ll be able to find a wider opening (look for the bigger gaps around gates) but when you have to shoot through cages get up as close as you can to them, use a longer focal length, choose a wider aperture and wait for the animal to move back from the cage. In many instances when you do this you’ll not even notice the distraction of the cage at all. But what if you are using a point and shoot with no control over aperture? Try switching to portrait mode which is a mode that uses a wide aperture and should narrow your depth of field.
7. Shoot People – speaking of people – they also make a great subject when at the zoo. Don’t just focus on the animals but look for the wonderful reactions of those around you as they react to the animals (they can sometimes be more animated than the animals as they mimic them).
8. Look for Humorous Situations - animals do the funniest things. Keep your camera up to your eye for that moment when the monkey points at you, the giraffe picks it’s nose with it’s tongue (sorry – they do do it) or when the Emu pokes its head through the cage to steal something out of someone’s bag.
9. Treat Animals as Moving Subjects – toovercome the problem of your subjects always being on the move consider shooting with a fast shutter speed. You might like to switch to shutter priority mode at a fast shutter speed or let your camera do the work by shooting in ‘Sports’ mode. You can also help with this by shooting in continuous shooting mode so that when your subject is on the move you capture a burst of shots quickly one after the other.
10. Plan your day - I’m a fairly spontaneous kind of person but when it comes to photography have learned that it’s worth thinking ahead. When you get to the zoo get yourself a map and work out which animals will be on your hit list. Also note any feeding times that are publicised (these can make for some action shots). You might also like to find a zoo keeper to ask them what times certain animals are more active. Another good strategy is to head to the gift shop of the zoo and take a quick look at their postcards and picture books that might give you a little inspiration and a few ideas on good shooting angles for different animals.
11. Patience – occasionally you’ll stumble upon an animal in the perfect pose for a shot when you first see it – but in many cases you’ll need to wait for it. Once you’ve picked the animals you want to capture give yourself extended periods of time to camp out at their enclosures. This way you’ll hopefully see them in a variety of positions and with different expressions. This is what often takes your zoo shots to the next level.
12. Think About Context – the beauty of zoo photography is that you get relatively close to animals (something that is obviously difficult in the wild). The challenge is that the environment is not a natural one and that on many occasions there will be distracting elements in the background or foreground. Where possible try to shoot from angles where ‘natural’ looking elements are included (vegetation etc) – but where there are distractions you might like to try using wide apertures (small numbers) which narrow depth of field and throw foreground and backgrounds out of focus. Also try cropping with focal length (or later at home with photoshop).
Read more: http://www.digital-photography-school.com/zoo-photography#ixzz1La7sch8Y
12 Tips for Photographing Stunning Sunsets

‘No good travel photo album is complete without the token sunrise or sunset picture!’
Many travelers seem to live by this mantra – however most sunset and sunrise photographs that I see are quite disappointing.
They need not be – sunsets and sunrises are not that difficult to photograph!
Tips for Photographing Stunning Sunrises and Sunsets
Think Ahead - While sometimes wonderful sunrise and sunset shots can be taken spontaneously without any forethought it’s often the case that the best ones come out of planning. Scope out places that might be good for sunsets in the day or two before your shoot. Look for interesting places where you might not only be able to see the sun track all the way down but where there will be opportunities for shots that include foreground elements and silhouettes. Sunsets only take half an hour or so so you want to think about these elements before they start or you might miss the shots you’re after.
Find out when the sun will set or rise and get there at least half an hour before hand as it’s often in the lead up to and the time after the sun appears or disappears that the real magic happens.
Keep an eye on the weather also. There are a variety of different types of sunsets that produce a range of different types of lights and patterns in the sky. Don’t just go for clear days for these shots – while they can produce some wonderful colors it’s usually the times where there is cloud around that the real action happens! Also be aware of days when there is dust or smoke in the air as they can produce amazing results also.
Consider ahead of time what equipment you might need. Include a tripod, lenses that will give you a range of focal lengths, extra batteries etc.
Composition Techniques
Shoot at a variety of focal lengths – wide angle can create sweeping landscape shots but if you want the sun itself to be a feature of the shot you’ll want to be able to zoom right in.Keep in mind that the sun is just half a degree across so when you shoot with a wide lens it will only be taking up a reasonably small part of the photo. If you want it to be a feature of your shot you’ll need to zoom in on it using anything from a 200mm lens upwards. This will increase your need for a tripod!
Also be aware that when you look at the sun at the best of times it can be dangerous but when you look through a magnifying lens it can be quite dangerous is the sun is still too high in the sky.

Silhouettes as focal points - As with all photos, sunsets need a point of interest and one of the best ways to add one to a picture is to try to incorporate some sort of Silhouette into the shot. This could be something large like a mountain range, something that is part of the environment like a palm tree or a pier or could even be a person.
The great things about Silhouettes is that they add mood and context to a sunset or sunrise shot. I’ll write more on silhouettes in a future article.
Rule of thirds – Remember the rule of thirds in your photographing of sunrises and sunsets. While you can always break the rule it’s often a good idea to place elements like the horizon, sun, silhouettes etc off centre.
Exposure Techniques
Shoot at a variety of exposures - if you let your camera decide what shutter length to shoot at you’re likely to get a shot that doesn’t really capture the beauty of the light. Quite often the shot will be under exposed because the sky is still reasonably light.Instead of relying upon the camera’s auto mode a sunset is an ideal time to switch your camera into aperture or shutter priority mode and to take a variety of shots at different exposures.
The great thing about sunsets and sunrises is that there is no one ‘right’ exposure and that you can get stunning results using a variety of them. Also keep in mind that different exposures (aperture and shutter speeds) will produce a variety of different results so it’s worth taking more than just a few shots – the key is to experiment.
I tend to switch into shutter priority mode and start with a relatively quick shutter speed and then slowly work down to slower ones.

Bracketing – Another technique to try to get the right exposure is ‘bracketing’ where you look at what the camera suggests you take the picture at and then take a few shots at both under and over that mark. ie if your camera says to shoot at 1/60th of a second at f/8 you would shoot off a shot at 1/60 at f/5.6 and then at f/11. In doing so you end up with a series of shots at different exposures which will all give you slightly different results and colors. Most DSLR’s and some point and shoot digital cameras have a built in bracketing feature so you don’t need to do this manually – learn how to use it!
Auto Exposure Lock - Another exposure trick, if you don’t have a bracketing mode or don’t feel confident in using it is if your camera has ‘auto exposure lock’ which allows you to point your camera at a darker place and lock in exposure for that spot (ie you could point it at the ground in front of you and lock in that exposure) and then reframe the picture looking at the sunset. This will mean you get a more over exposed shot.
Take camera out of Auto White balance mode – when you set your camera to ‘Auto’ in it’s white balance mode you run the risk of losing some of the warm golden tones of a sunrise or sunset. Instead try shooting in ‘cloudy’ or ’shade’ which are usually used in cooler lights and tell your camera to warm things up a little. Alternatively – if you’re shooting a sunrise and DO want a cooler moody shot you can experiment with other white balance settings.
Other Sunset and Sunrise Tips

Tripod – If you’re shooting at longer shutters speeds and with longer focal lengths then a tripod or some other way of ensuring your camera is completely still is essential.
Manual Focus – sometimes when shooting in extreme lighting conditions some cameras can have trouble focussing. If this is the case for your camera consider switching to manual focus to ensure you get nice crisp shots.
Look around you – The wonderful thing about sunsets is that they not only create wonderful colors in the sky in front of you but they also can cast a beautiful golden light that is wonderful for other types of photography. As the sunset progresses keep an eye on other opportunities for shots around you (not just in front of you). You might find a great opportunity for a portrait, landscape shot, macro shot etc behind you in the colden light.
Keep Shooting – A sunset or sunrise constantly changes over time and can produce great colors well after the sun goes down or appears so keep shooting at different exposures and focal lengths as I’ve mentioned above until you’re sure it’s all over.
Read more: http://www.digital-photography-school.com/how-to-photograph-sunrises-and-sunsets#ixzz1La76I5t0
How to Photograph Pets

Grant (a reader) sent me an email this week asking for a some tips on Pet Photography.
Here’s my top ten tips on taking great photographs of your pet:
1. Start with Your Pet’s Personality
Before you start photographing your pet ask yourself ‘what sets it apart from other animals?’ Think about what type of personality it has and then attempt to capture some of that in your shots. For example if everyone knows your pet as a sleepy, lazy or placid little thing set up your photo shoot around it’s bed or where it goes after a meal to lie in the sun and you’ll have every chance of capturing a shot that sums your pet right up. Alternatively if your pet is hyperactive, inquisitive and always on the move it might be better to do your shoot at a local park where it’s racing around, jumping for balls or playing with other animals.
2. Think about Context
In choosing the location to photograph your pet you might want to consider a variety of other factors also. For starters choose a place where your pet will be comfortable and at ease. Also consider the familiarity of the location and the emotions that it will evoke in you as the pets owner. For example you might have a place that you and your pet have had some special moments together that will mean a lot in the future as you look back over your shots. Lastly consider the background of your shots. Ultimately you don’t want your backgrounds to be distracting from your photo – sometimes the best locations are the plainest ones – a large patch of green grass, a well lit room with white walls and plain carpet etc can be ideal. Of course this can also be tool plain and sterile – my motto is that if the different elements in the background of the shot don’t add to it avoid them.3. Get in Close
Pets come in all shapes and sizes but in most cases they are smaller than a human and as a result they tend to end up getting a little lost in photos unless you make an effort to get up close to them. Of course getting close is not always easy, especially if you have a pet that likes to move around, but it’s worth making the effort as the detail that can be gained and the personality that can be captured by an up close and personal photo shoot with a pet can really lift a photo to a new level. If you can’t physically get close to your pet get your camera equipped with a zoom lens. The added benefit of a long focal length is that it will help with isolating your pet in terms of depth of field (ie give you a nice blurry background so that your pet is center of attention with no distractions).
4. Get On Their Level
Get down on your pets level where you can look upon them eye to eye. Images taken by a photographer standing up and looking down on their level not only leave you too far away from your subject but they also mean the shots end up having a very ‘human perspective’. Getting down on your pets level means you enter their world and get a glimpse of what life looks like from their angle – you’ll be impressed by the results as they are more personal and have a real element of intimacy.5. Mix Up Your Framing
Pets, like human subjects’ look different from different angles and framing them in a variety of ways can bring out different perspectives to your shots. In your photo shoot take some tightly cropped facial shots (even focussing right in on single features like eyes, noses, ears, whiskers etc) but also make sure you take three quarter body shots as well as full body shots. In this way you end up with a series of shots that give viewers of your photos a full perspective on who your pet is.
6. Lighting
Light makes any photograph what it is and when it comes to pets it’s especially important. In general I wouldn’t recommend using a flash as they tend to distract pets and in some cases will even frighten them. The other issue with flashes is that they can create spooky red-eye problems with some animals (in the same way they do with humans). Natural light is a much better option than using a flash and so where possible outside photo shoots tend to work best (or at least in a well lit window inside). The only exception I would give for using a flash is when your pet has very dark (or black) fur as it tends to absorb light and a flash can add detail. With dark fury pets you might want to slightly over expose your images for this same reason. Alternatively with white pets you run the risk of over exposing shots so try to find a location out of direct sunlight and definitely avoid a flash.7. Include People
One of the best things you can do to add context to a shot is to include the special people in the life of your pet in the image. Shots with the owner or other family members interacting with your pet can make the images incredibly special for years to come. You might like to try posed shots but sometimes it’s the candid shots of owner and pet at play (or snoozing together in front of a fire) that really capture the character of the pet and evoke emotion.
8. Freeze the Action
Many pets present a challenge to photographers because they are active and always on the move. The key with any subject that’s on the move is to freeze their action by using a fast shutter speed. Most digital cameras these days will allow you to shoot in full manual mode if you feel confident to get the mix between shutter and aperture right – alternatively you can work in shutter priority mode where you set the shutter speed and the camera automatically does the rest by picking a good aperture to work with your shutter speed. The last alternative is to use ’sports’ mode which will mean the camera will select the fastest shutter speed possible for your situation. Once you’ve got your shutter speed nice and fast make sure your camera is always at the ready so you can anticipate the actions of your pet. If they are a fast mover you might also want to consider shooting in continuous mode (burst mode) to take a quick series of shots in a row. This can also lead to a wonderful sequence of shots that work well together.
9. Be Playful
Pets can be playful little critters and rather than attempting to contain this to get them posed for that special shot it’s often very effective to go with their playfulness and make it a central feature of your image. Include their toys, stimulate them to look longingly into your camera by holding a special treat above your head or take a picture with them sitting on top of you mid wrestle etc. Make your photo shoot a fun experience for both you and your pet and your shots are likely to reflect it.10. Catch them Unawares
Posed shots can be fun and effective but one thing I love to do (whether it be with animals or people) is to photograph them candidly paparazzi style. I have very fond memories of stalking a friend’s dog as he played in a back yard one day. I took shots while he dug up flowers, as he buried a bone, as he fell chased a bee around and ask he sat contentedly with his head sticking out of his dog house. The whole time I photographed him he was barely aware of my presence so the shots were very natural without me distracting the dog from his ‘business’.Update – 11. Try a Wide Angle Lens
One of the techniques I’ve experimented with lately is using a wider angle lens. This allows you to get in close (point 3) but also fit in a lot of the pet. The other benefit of it is that using a wider angle lens will often give your image a little distortion that will give your image a new creative and fun perspective. Read more on Using Wide Angle Lens Distortion Creatively.Read more: http://www.digital-photography-school.com/how-to-photograph-pets#ixzz1La6SPfEs
10 Beach Photography Tips

Here in Australia we love to hit the beach.
We’re one big island and most of our population is scattered along the coast line so the beach is a natural place for us to go both on day trips and longer holidays.
Beaches present digital camera owners with a number of wonderful opportunities as they are places of natural beauty, color and interesting light. However they also present a variety of challenges including camera damage, privacy issues and making large open spaces interesting.
While it’s not really beach going weather at present here in my part of the world I know that many readers of this site are getting close to Summer and beach photography will be high on the agenda of many (I’m so jealous).
Here are 10 tips for when you head to the beach with your digital camera next:

1. Look for focal points
A friend of mine once told me that they don’t bother taking their camera to the beach because all beach shots look the same. i thought that that was a pretty sad thing to say because when I go to the beach I see it as a place brimming with photographic opportunities if you have the ability to look beyond the cliche shots. For example while many people take shots looking out to sea I find it interesting to go to the water’s edge and then turn completely around and see what’s in your frame from that angle. One common problem with landscape beach photographs is that while they might capture a beautiful scene they actually have no point of interest and can as a result be rather empty and boring. When taking a shot look for a point of interest or focal point that will give those looking at your photo a place for their eye to rest. Perhaps it’s a pattern in the sand, a set of footprints, the crashing of waves over a rock, a life saver’s tower etc. Also look for the little things that tell the story of going to the beach like shoes at the waters edge, sand castles, sunglasses, sunscreen lotion etc. Sometimes these can make wonderful little feature shots to break up your vacation album.2. Timing is important
The start and end of days can present the best opportunities for shooting at the beach. For starters there will be less people there at that time of day but also you’ll find that with the sun shining on an angle that you often get more interesting effects of shadows and colors – particularly in the evening when the light becomes quite warm and golden.Get more tips for free by subscribing to our newsletter or RSS feed

3. Watch the Horizon
One of the most common problems in beach photography where there are wide open spaces with a long and often unbroken horizon is sloping horizons. Work hard at keeping your horizon square to the framing of your shot (more on this here). Also consider placing your horizon off centre as centered horizons can leave a photo looking chopped in half (more on this in our post on the Rule of Thirds).4. Head to the Beach When Others Avoid it
Another timing issue is that the beach can really come to life on those days that everyone avoids it because of inclement weather. Stormy seas, threatening and dramatic clouds and wind slowing lifesaver flags and trees over call all make for atmospheric shots.5. Exposure Bracketing
One of the challenges of shooting in the middle of summer on a beach is that it can be incredibly bright and your camera could want to under expose your shots if you’re shooting in Auto mode. If your camera has a manual mode it can be well worth playing with it at the beach and experimenting with different levels of exposure. I find that I get the best results when I look at what the camera wants to expose the shot at and then over expose it by a stop or two. Of course this depends greatly from situation to situation – brightly lit landscapes are generally very tricky – especially if you have shady areas as well as bright ones. Sometimes it’s a matter of working out which area you want to be well exposed and focussing on that area as to get everything right is often impossible.
6. Spot Metering
If your camera has spot metering you can overcome some of the above exposure problems. Spot metering is a feature that some cameras have whereby you tell the camera which part of the image you want to be well exposed and it will get that bit right. This is particularly useful in bright light when you want to get a shady area exposed well. It will optimize the shady area (and the other areas will be over exposed – but at least your main subject will be ok). This can be effective especially when photographing people as it allows you to face them away from the sun and to meter on their shadowy face and therefore avoid squinting (a common problem with photographing people at the beach).7. Fill Flash
If you’re photographing people at the beach as a portrait and it’s bright you’ll find that they will almost always have shadows on their face (often cast by hats, glasses, noses etc). Switch on your flash and force it to fire when shooting in these situations and you’ll find the shadows eliminated and your actual subject is well exposed. This is particularly important when shooting into the sun when without a flash you could end up with your subject being at some stage of becoming a silhouette). If your camera gives you some level of control over how strong a flash to fire you might want to experiment with this also as firing a full strength can leave your subjects looking washed out and artificial. If your subjects do look overexposed and you cant decrease the flash strength try moving back a little from your subject and using your zoom to get a tighter framing as this will decrease the impact of the flash. As usual – experimenting is the key.8. UV Filters
UV filters are useful for DSLR owners a couple of reasons in beach photography. Firstly they act as a protection for your lens (see below) but also they do filter out ultraviolet light in a certain range. This can cut back on atmospheric haze (often a blueish haze/tinge). The visual impact that they have is not great but they are the first thing I buy when I get a new lens for my DSLR.
9. Polarizing Filters
One of the most useful DSLR lens accessories that you can add to a digital camera is a polarizing filter. Without getting too technical, a polarizer filters out some light that is polarized. This means that it reduces reflections and boosts contrasts. The most noticeable places that this has impact is with blue skies (potentially it can make them incredibly rich and almost dark blue) and in water/ocean in which it can give a variety of effects. The way many people explain the results of a polarizer is the difference that polarizing sunglasses can make when you put them on (in fact I know quite a few photographers who shoot through their sunglasses if they don’t have a polarizer with them. Get a polarizing filter and experiment with it and you’ll quite literally be amazed by the results.10. Black and White
One technique that I’ve been using a lot lately in beach photography (and other genres also) is to do a little post photo production and see what impact stripping a photo of color has upon it. There’s something about a black and white shot at the beach that completely changes the mood and feel of a shot. It’s also a great way to bring to life beach shots taken on dull or overcast days which can often leave a beach scene looking a little colorless.Related Reading: Also read our post on Beach Photography and Digital Camera Maintenance and a further tutorial on Beach Photography.
Read more: http://www.digital-photography-school.com/10-beach-photography-tips#ixzz1La5Mjy7v
Photographing Urban Landscapes
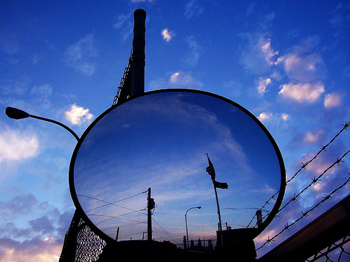
by Darren Rowse
I love cities. While I enjoy getting out into the wide open spaces of the countryside I am also a big fan of the hustle and bustle of inner city life. It’s not for everyone but I find that such areas are so interesting to spend time in – both on a personal level but also photographically.
Some people might be a little depressed by the greyness of concrete, towering skyscrapers and graffiti covered walls – but I find them full of photographic potential.
Urban Landscape Photography looks for these photographic possibilities in the cities and and urban areas where we live and work.
Urban Landscape photography is a little slippery to define as it sits between a number of other genres. For the purposes of this article let me contrast it with a few related photographic genres:
- Cityscape Photography – urban landscapes go beyond the capturing of the big picture cityscape that is usually quote polished and clean.
- Architectural Photography – urban landscapes are less interested in the building and it’s architectural style and more interested in what happens in and around it.
- Candid Street Photography – urban photography focussed more upon the city itself (and it’s life) than the people who live in it.
1. Take a Variety of Lenses
I find that taking two lenses with me is usually enough for urban photography. I prefer to take one wide angle lens and a zoom with a fair bit of length to it. Longer focal lengths are useful for capturing the details of building and street scenes (be aware that they also tend to flatten pictures) but wide angle lenses are great for capturing the big picture and they tend to give a bigger depth of field which can add interest and a nice feel to your shots.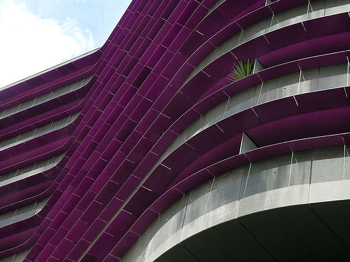
2. Other Gear to Take
The gear you take on an urban landscape shoot will of course reflect your own style of photography (and budget) but in addition to the above two lenses and DSLR I take a monopod (or tripod if I’m going to shoot into the evening), polarising filters, UV filters (for when I’m not using the polarisers), sling style camera bag (I use a Crumpler bag which I find gives me the access I need as well as being reasonably inconspicuous, spare batteries and I generally take my external flash with me (although I don’t use it as much for landscape shots – it’s there more if I find a good portrait opportunity).3. Look for Contrasts
One of the things that I love about cities is the diversity that you can find there – both in terms of the people (it’s where all types come together) as well as visual diversity in the sites you’ll see there. Look for and capture the contrasts between architectural styles, building materials, colours etc and you’ll end up with some very interesting shots.4. Regarding People
A constant challenge for urban landscape photographers is that cities are places where people naturally gather. There’s nothing wrong with people but in urban photographs they do tend to become the focal point of shots whether you want them to be or not. My thoughts on people in urban photography is that you either work with the fact that there are people in the shots and use them as a focal point or if possible they need to be eliminated from the shot – there’s not really too much middle ground. One way of eliminating people from shots is to shoot on weekends or after work hours. Ultimately when it comes to whether to include people in a shot or not I ask myself the questions ‘are they relevant to the shot?’ and ‘do they add or take away from the composition?’. If they add something – include them. If they distract – get rid of them.5. Evidence of People
If you choose to take the approach of eliminating people from your shots they almost always still live in the shots by the things that they leave there. Urban landscapes don’t always include people directly but speak about the way we live (both good and bad). It can be very powerful to look for the evidence of people in a landscape and to feature this in your shots. In doing so you add layers of interest and make your photos more dynamic.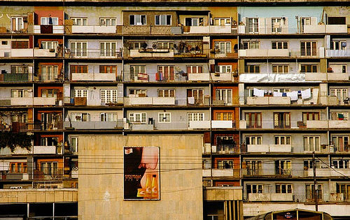
6. Research Your Locations
Urban landscape photography might seem like a pretty spontaneous thing (and at times it can be) but many of the most spectacular shots are a result of careful planning. It’s amazing how a location can change depending upon the time of day (as a result of angles of light especially) so scout out potential locations at different times of the day and consider returning to the same location over time to see what else it might offer. In terms of what time of day is ‘best’ to photograph – I’m not sure there is one but my personal preference is late afternoon or on days which are overcast but where it’d not too dark.7. Look for Themes
While there is real diversity in urban areas there are also many recurring themes of life. For instance I recently saw one exhibition of urban landscapes that explored the places people lived in a city – it was a series of people’s home ranging from park benches, to converted warehouses, to old period homes. Seeing them side by side was quite powerful.8. Look for Mirrors
Many buildings these days are built with highly reflective surfaces. These can both present themselves as an opportunity and a challenge. Some stunning effects can be achieved by shooting the reflections in such buildings – to find the perfect way to do this often means you need to try lots of angles to find the best reflection. If you want to eliminate the glare or unwanted reflections from mirrors or shiny windows it is worth investing in and using a polarising filter.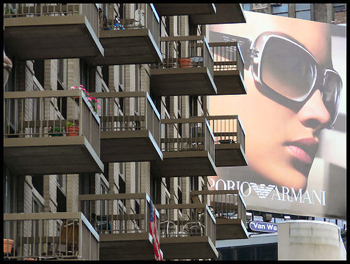
9. Shoot into the Evening
Cities change incredibly as evening comes and the lights go on. What can be a drab or featureless scene can quickly become something with a lot of character and mood. I enjoy shooting in the twilight zone between day and night as there is still light in the sky but you also get the impact of city lights.10. Explore Different City Zones
One thing that fascinates me about cities is the differences in the feel and sites that you can witness from area to area. Within a block or two you can move from a business district or commercial zone to a gritty, run down industrial zone or a trendy inner city residential or shopping area. Many urban landscape photographers have a preference for one or more of these types of areas but if you’re just starting out it can be worth experimenting with exploring the possibilities that each of these areas can present you with. Keep in mind that not all areas of cities are always safe – sometimes for this reason it can be wise to shoot with others.11. Finding the Urban in the Suburban or Rural
Perhaps I’ve been a little ‘city-centric’ with this post – but most of what I’ve written about can be explored in the suburbs of our cities and even smaller towns as really urban landscapes document and explore the places where people live and gather – bid or small.Read more: http://www.digital-photography-school.com/photographing-urban-landscapes#ixzz1La4ScTZl
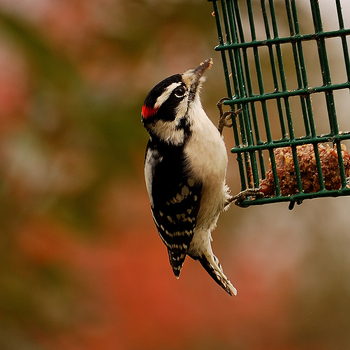
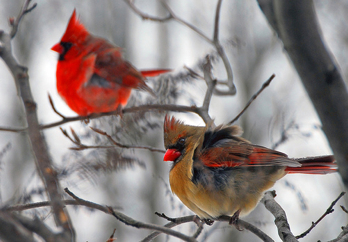
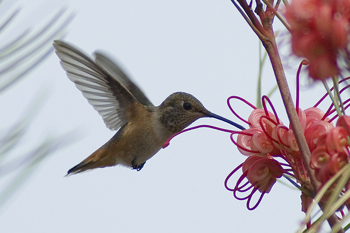
Backyard Bird Photography Tips
Backyard Bird Photography Tips
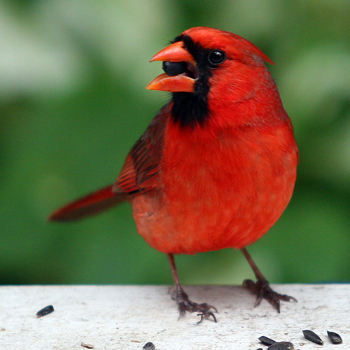
The following thoughts on Backyard Bird Photography was submitted by NaturesPixel (our forum Administrator). Check out her Flickr account - particularly her bird photography (one of which is the second shot in this article).
Best Time of Year
The best time of year to photograph birds is Spring. That way you have the opportunity to capture birds you wouldn’t normally see due to spring migration. Later in spring you can also capture the adults tending to their offspring. That being said, any time of year can be good, in late Autumn you will get the migration coming back down south and winter you may have birds that live north during summer but live in your back yard during winter.Best Time of Day
Early morning is best. I find within the 3 hours after the sun rises the birds are at their most active. At this time the sun is not at full strength which gives you nice even light. Two hours before sunset can also be a very fruitful time.Camera Gear
To get ‘pro’ shots in the wild you will need a SLR/DSLR with a 300mm (or more) lens, but in the back yard the rules change. You can even get good shots with an advanced point and shoot with 10x Zoom as I did with my Minolta Dimage Z5.You will need a tripod to steady yourself also I some times set my camera up in the yard closer to the feeders, sit back away from the camera and use my remote to fire off the shutter. So I recommend you have at least a 10x zoom or a 200mm lens, a Tripod/Monopod, remote shutter release and most of all patience.
Camera Settings
I recommend using either continuous focusing or manual focusing with pre-focusing on the branch/perch or feeders. I set my white balance manually although as I do tend to forget that sometimes I always shoot in RAW. That way if I do forget to set my white balance or my exposure is off a little I can fix within my image editing software.
I tend to shoot in Aperture Priority Mode when shooting birds that are feeding, that way you can control the depth of field.
With in flight birds I shoot in manual mode, setting the shutter and aperture. This is all a learning curve that takes practice and patience.
Attracting Birds
There are numerous way to attract birds and it will largely depend upon the type of birds that are in your area.- Flora – One alternative is to plant native plants, shrubs, and/or grasses. For example planting a chokecherry will attract Cedar Waxwings and Robins to your yard for the 2 weeks that the berries are ripe. There are ten native plants that attract hummingbirds to your yard also. In the end I recommend you do the research for each bird that you want to attract as each will have it’s own unique things that attracts it.
- Water – Another alternative is to have a running waterfall or pond that will attract birds that don’t feed from feeders. Also having fresh water in a shallow dish will help.
- Seed – Most feeders come in a variety of shapes and sizes (again research is needed to find the right one for the type of birds you’re hoping to attract). Keep in mind that most feeders are not aesthetically pleasing to the eye and could prove to be distracting in your shots. This is where your imagination comes in and you can get creative. For example try hanging extra large sunflower heads off trees, get semi hollow logs and placing them upright with seed in the top etc.
- Perches – Using perches made from broken branches and twigs can be good as they will provide a place for the birds to sit. Make sure that you use the right size branch for the size of bird you are trying to capture.
I could go on and on about attracting birds to your backyard but the rest is up to you to research as each yard and bird species is so different.
Setting up and Positioning yourself
There are a few things you can do here that will help you create a place that birds feel comfortable to visit without knowing you’re there.- You can get a hide (a camouflage tent)
- Hide behind something (I hide behind the lattice on my back deck)
- Shoot from inside your house – I shoot from my bedroom, particularly in winter. I have the feeder set up just off my bedroom window. You can shoot from whatever room you like, even the bathroom, as long as it gives you a clear line of sight. Just make sure you clean the glass. A polarizer can help in this situation. It can help with the glare if you are picking it up off the glass.
Birds In Flight
I don’t have many in-flight shots because they are harder to do, but here are a few tips that will help.You can get shots of birds flying off from the feeder by pre focusing just off the feeder and setting your shutter speed and aperture manually.
Here is one tip I will try this season. I have one feeder where the birds have only 2 ways to land there. I plan to set my camera on a tripod just behind the feeder and, using my remote, I will fire off shots as they are coming into land. This should capture them with their wings stretched out.
Conclusion
Just remember, bird photography takes practice and patience. You will toss many more shots into the trash then you keep, but that’s why we shoot digital.Getting into the backyard can be rewarding. You get to see Mother Nature at her best and you get to help save some species.
For example, here in Ontario the Black Capped Chickadees need help, so feeding them through the year can help the species survive. There are some great websites that can help with identification, like eNature.com that you can search with your zipcode if you live in the United States. Search via zipcode and eastern western cananda, there are many different sites that pertain to different parts of the world. Your countries government environmental website will also have some good information.
Do you have some bird photography tips to share? Head over to the forums where we have a bird photography thread for your questions, tips and photos.
Read more: http://www.digital-photography-school.com/backyard-bird-photography-tips#ixzz1La3V1gNb
Subscribe to:
Posts (Atom)